
| Orig. Posting Date | User Name | Edit Date |
| Nov 17, 2017 03:20PM | nkerr | |
| Nov 17, 2017 05:55AM | CooperTune | |
| Nov 16, 2017 09:43PM | rowancliffe | |
| Nov 13, 2017 08:27PM | Hunter2 | |
| Nov 13, 2017 07:17PM | kd | |
| Nov 13, 2017 05:17PM | ssuperflyoldguy | Edited: Nov 13, 2017 05:23PM |
| Nov 13, 2017 05:05PM | Hunter2 | |
| Nov 13, 2017 12:44PM | ssuperflyoldguy | |
| Nov 13, 2017 12:31PM | mousy | |
| Nov 13, 2017 05:55AM | CooperTune | |
| Nov 12, 2017 06:56PM | Veggivet | |
| Nov 12, 2017 02:29PM | Hunter2 |

|
Total posts: 654
Last post: Dec 20, 2017 Member since:Sep 24, 2011
|
Cars in Garage: 0
Photos: 0 WorkBench Posts: 0 |
|
one more old used appliance re-use idea is an old dishwasher for parts cleaning
John Twist had a commercial dish washer in his shop in Ada Michigan which would work wonders on old parts!
N
John Twist had a commercial dish washer in his shop in Ada Michigan which would work wonders on old parts!
N
|
|
Total posts: 4134
Last post: Oct 13, 2020 Member since:Oct 8, 2011
|
Cars in Garage: 0
Photos: 0 WorkBench Posts: 0 |
|
A little off topic, there is a kitchen supply store a couple of miles from my house. They have out fitted our kitchen twice over the years. I stopped by a couple of years back and talked to the delivery guys. When they deliver a new stove they remove the old one and take it back to their shop for the junk man. They agreed to keep an eye out for a good one. With in a week I got a call and picked up a very nice old school stove with everything working. The timer is a big help letting me know when to cut off and open the door to cool. I tipped the guy $20. and use it daily when prepping parts. Two varisol cleaning tanks, three blast cabinets with different material a well lit small paint booth and the oven. Small parts prep takes time but shows well when done. Steve (CTR)
|
|
Total posts: 10
Last post: Nov 20, 2017 Member since:Nov 9, 2017
|
Cars in Garage: 0
Photos: 0 WorkBench Posts: 0 |
Well done. I'm impressed.
|
|
Total posts: 6469
Last post: Sep 29, 2022 Member since:Nov 2, 2006
|
Cars in Garage: 4
Photos: 1354 WorkBench Posts: 2 |
|
POR 15 Deb...hope it lasts as long.
|
|
Total posts: 1398
Last post: Dec 25, 2020 Member since:Mar 9, 2000
|
Cars in Garage: 0
Photos: 0 WorkBench Posts: 0 |
|
Rick,
What are you using for the black paint?
For my Riley's rebuild in 2005 we used POR 15 and 12 years and 12000 miles later it still looks like brand new.
No chips, no loss of shine,,,
Looking good.
Deb
What are you using for the black paint?
For my Riley's rebuild in 2005 we used POR 15 and 12 years and 12000 miles later it still looks like brand new.
No chips, no loss of shine,,,
Looking good.
Deb
Keith & Deb
Avatar:Turn 1 at the Glen
|
|
Total posts: 1268
Last post: Feb 23, 2020 Member since:Oct 30, 2008
|
Cars in Garage: 0
Photos: 46 WorkBench Posts: 1 |
Hunter - (edit, thanks for the paint info, reminds me I gotta get an oven for the back yard..) as I get older I take longer to get things done because I don’t want to go back in n fix stuff again so I do as best as I’m able to pull off. You have raised the bar (again), now I have to spend a weekend getting my sandblaster hooked up so I can paint all the incidentals....working near Nick Upton’s once in awhile sure takes a toll on the parts budget...
i have my brother building one of those inner CV joint axle pullers & also machining up a trailing arm reamer out of an old shaft. So less excuses now... once we try them out he’ll be putting them up on eBay.
i have my brother building one of those inner CV joint axle pullers & also machining up a trailing arm reamer out of an old shaft. So less excuses now... once we try them out he’ll be putting them up on eBay.
|
|
Total posts: 6469
Last post: Sep 29, 2022 Member since:Nov 2, 2006
|
Cars in Garage: 4
Photos: 1354 WorkBench Posts: 2 |
|
ssuperflyoldguy,
VHT hi-heat paint...can bake in the oven (but not when wifey is about) or paint will cure when braking the Mini on the road.
Did the AP calipers too (do NOT bake calipers, unless pistons & seals are out).
Cooper Freeflow Header & Maniflow twin box exhaust will also get VHT hi-heat paint (1,300 - 2,000 F)
|
|
Total posts: 1268
Last post: Feb 23, 2020 Member since:Oct 30, 2008
|
Cars in Garage: 0
Photos: 46 WorkBench Posts: 1 |
NICE! (Jealous too...I got too much backlog) I like the painted drums
|
|
Total posts: 1059
Last post: Sep 25, 2020 Member since:Mar 3, 1999
|
Cars in Garage: 0
Photos: 0 WorkBench Posts: 0 |
|
Those are coming along nicely Rick !!!!
Mousy
|
|
Total posts: 4134
Last post: Oct 13, 2020 Member since:Oct 8, 2011
|
Cars in Garage: 0
Photos: 0 WorkBench Posts: 0 |
|
I have several sets of rear trailing arms to include early welded, and cast wet and dry. I always try and remove the bearings and the tube with out damage to the tube. I don't have much faith in the plastic tube offered in current kits. I recently read on a UK forum about making a tube from house hold copper tubing and a coupling. I will take a OE tube and a slip stick to Lowes and see what I can find.
I also like to do up parts for future use. I recently rebushed and sized 38 diff. side covers, 10 rod change shifters and thinking about doing all my suspension arms front and rear. Welded and sent out 4 front sub frames for powder coating recently, three are already ear marked for projects. I have given up on selling auto subs and have made up spacers to convert to std shift mounting and welded in a lower dog bone mount.
I do so many adjustable front suspensions I have quite a collection of front lower arms and strut rods. May just glass bead and paint or powder coat and box in sets. I may also be getting deep in 8.4 calipers. The last couple of sets I rebuilt with SS pistons sat for a year or more before finding a home for them. Keep the pictures coming Steve (CTR)
|
|
Total posts: 252
Last post: Apr 19, 2024 Member since:Sep 29, 2014
|
Cars in Garage: 0
Photos: 0 WorkBench Posts: 0 |
Very nice work. Looking forward to the build, and the completed project.
|
|
Total posts: 6469
Last post: Sep 29, 2022 Member since:Nov 2, 2006
|
Cars in Garage: 4
Photos: 1354 WorkBench Posts: 2 |
|
Image Gallery
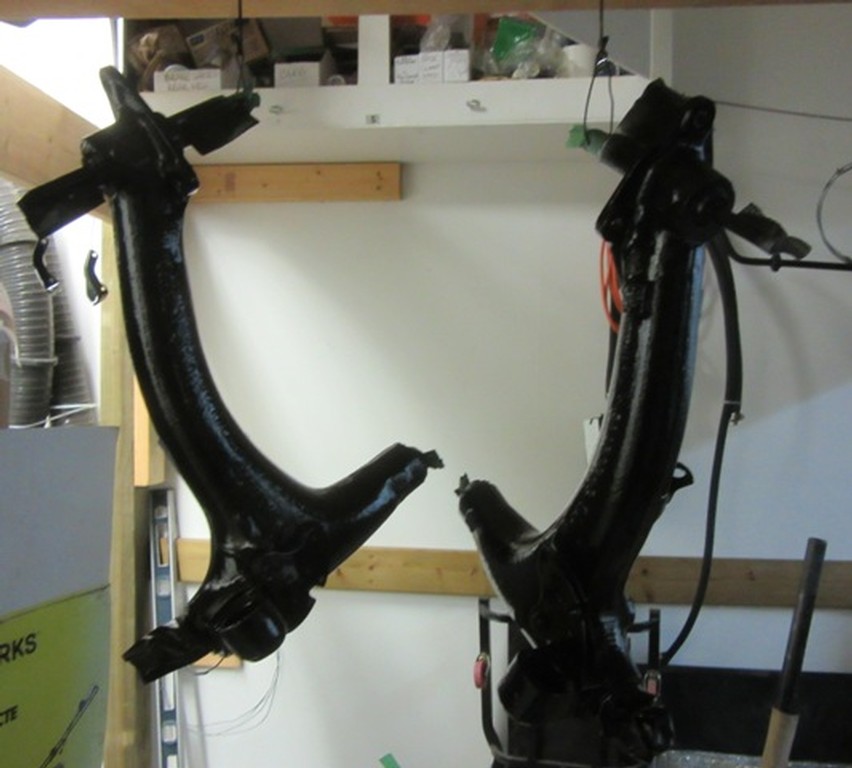
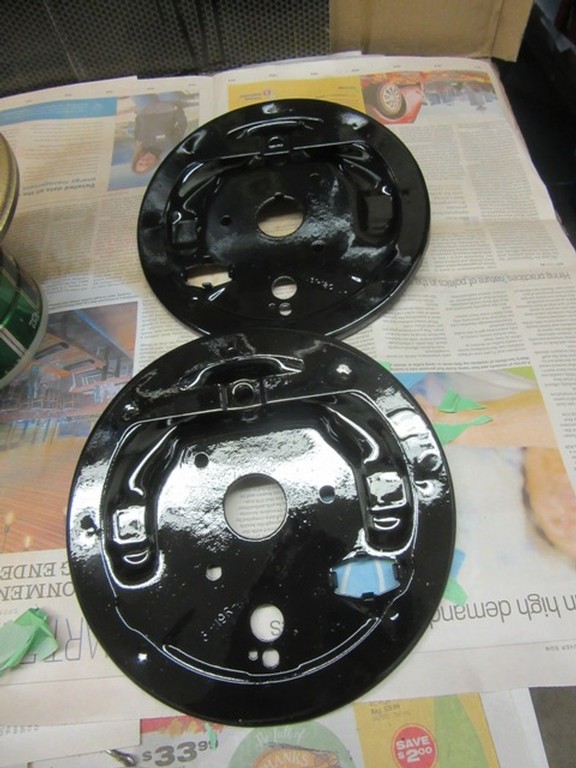
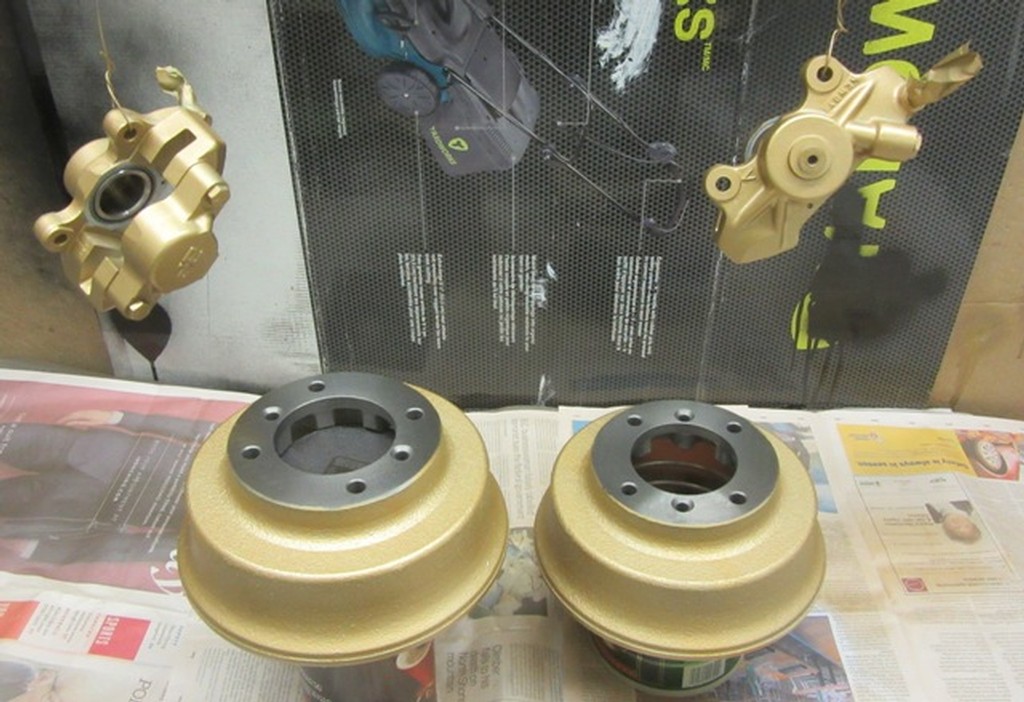
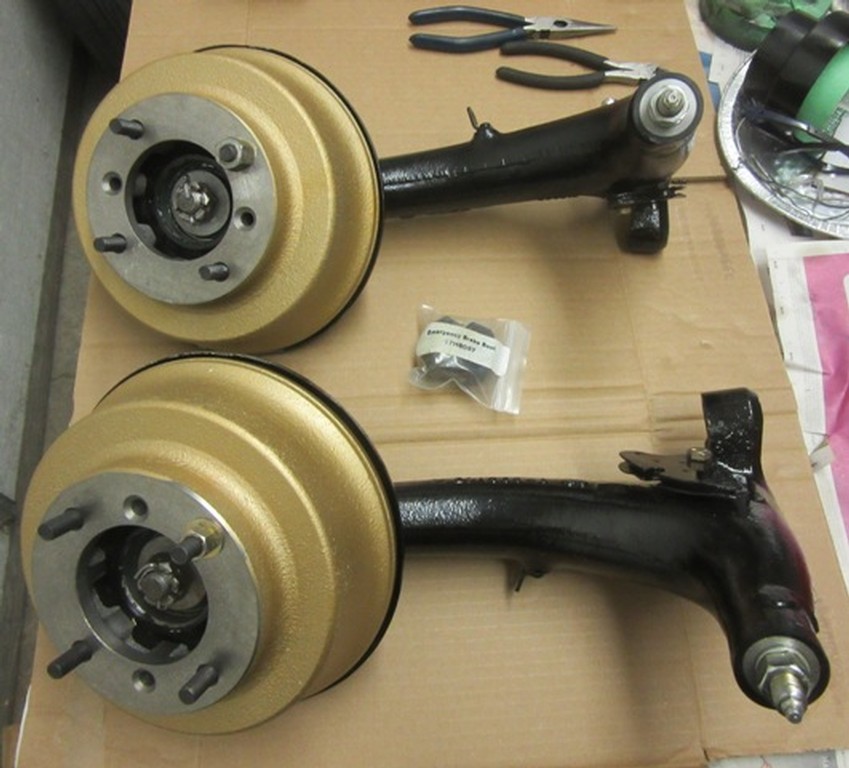
With new pivot pins, bearings & bushes, wheel cylinders, wedges, shoes, springs & drums, wheel bearings & seals...2 trailing arms are ready for service. My son thinks 20 years service life...well at least a good number of years.
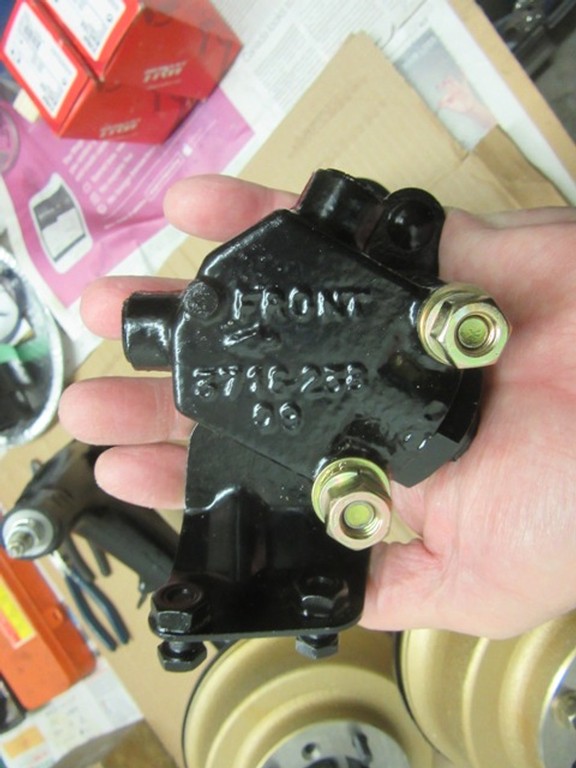
I bought 2 OEM brake bias valves from our host. Good price but in need of rust removal...so into the molasses/water bath, cleaned, primed, painted & with washer faced ready to go on the refreshed mounting bracket.
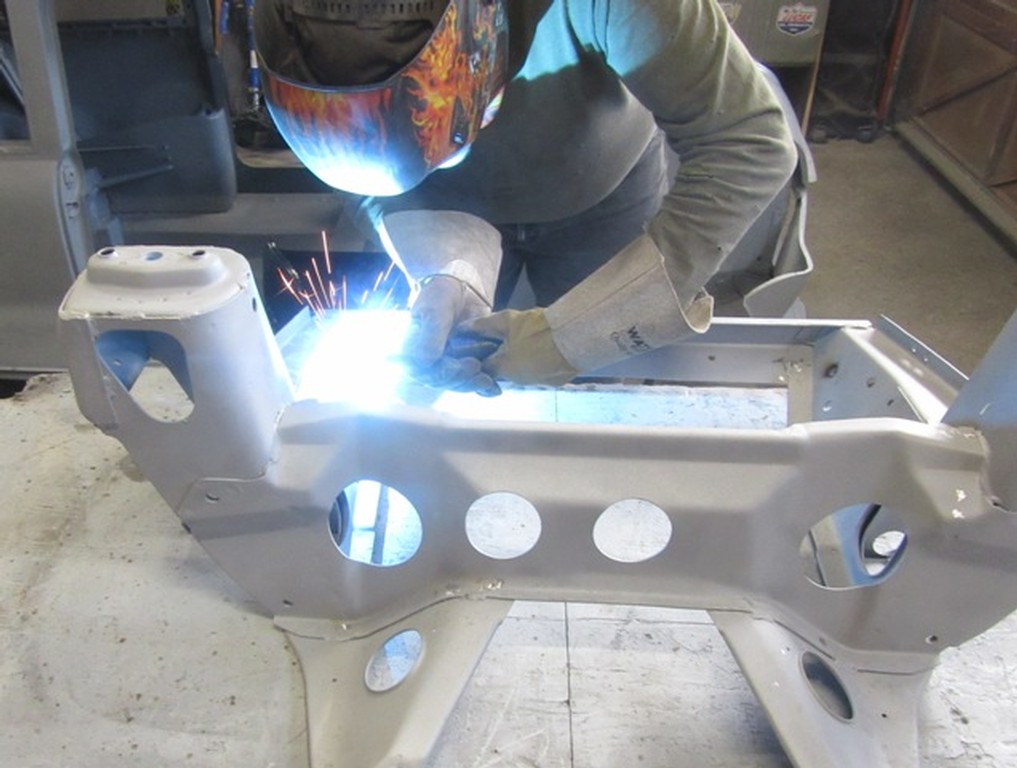
Next up...assembling front arms & rest of the HD suspension on redone front subbie with gussets for tie-rod ears, captive nuts for apron bolt up and welded in bracket for lower front engine steady.
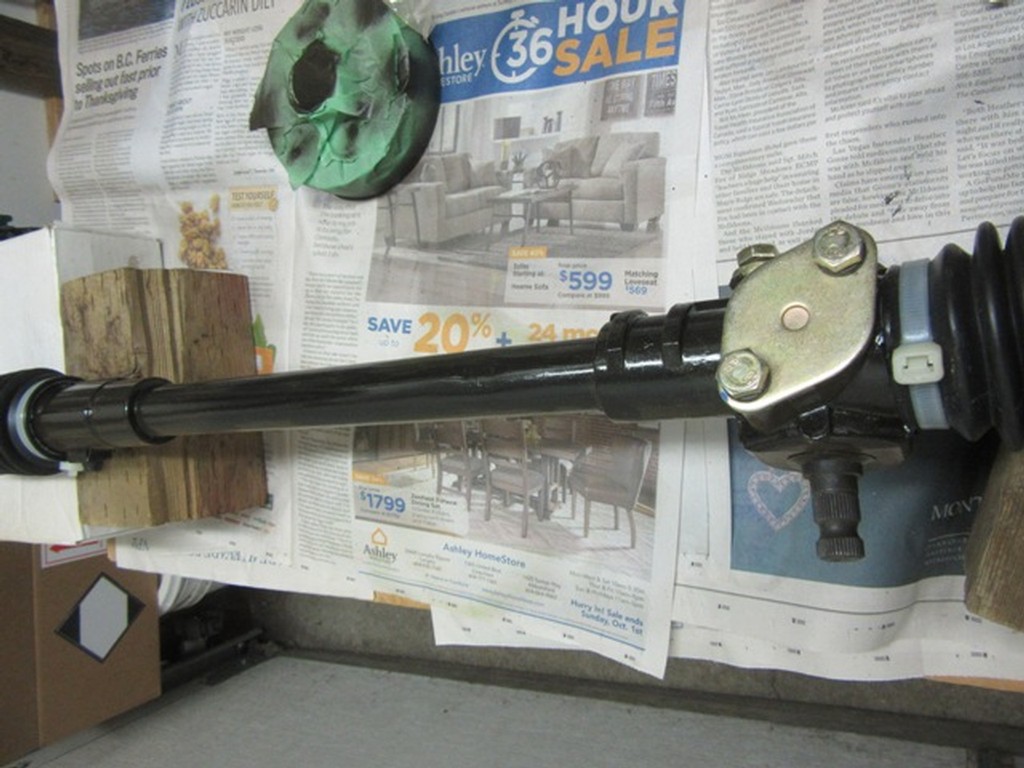
New steering rack painted, mounting bits in hand.
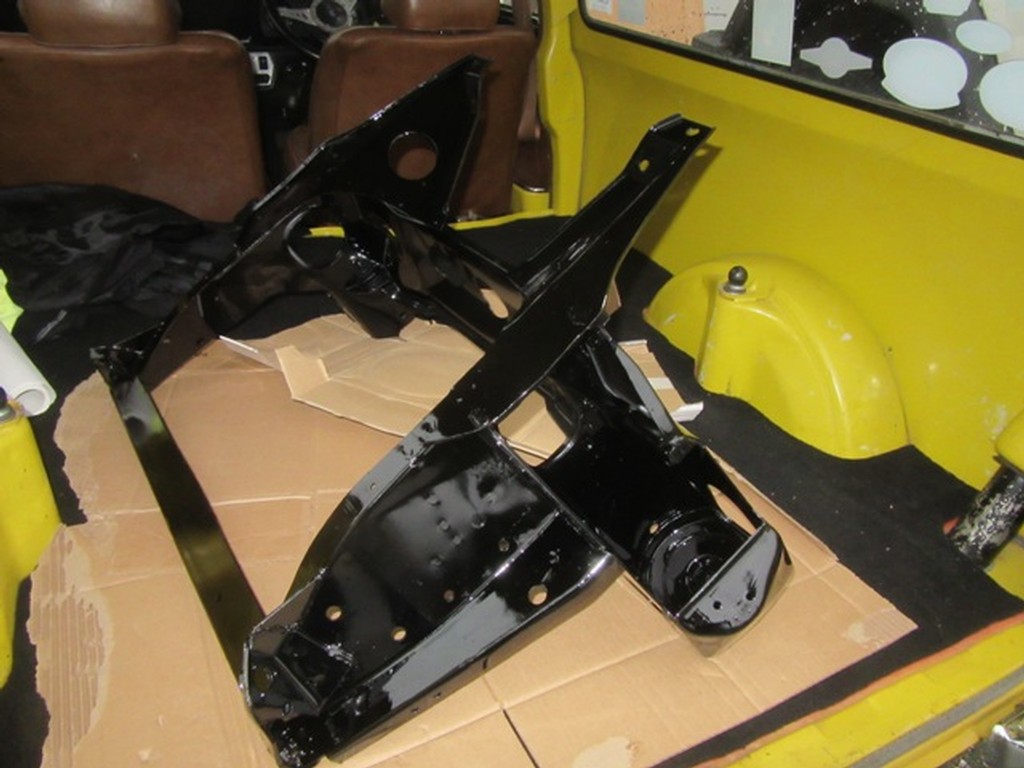
Mixing projects, I got a good used front subbie set up with welded gussets for the tie-rod ears & captive (wheel) nuts for bolting up the front apron, blasted in epoxy primer & paint. This will be ready when the 1098 comes out of the Aussie Van for the 1185cc build after Russell Engineering. No lower engine steady as OZ engine has two upper steadies as standard.


