
| Orig. Posting Date | User Name | Edit Date |
| Apr 28, 2016 12:24PM | nkerr | |
| Apr 28, 2016 11:47AM | Hunter2 | |
| Apr 27, 2016 02:29PM | nkerr | |
| Apr 27, 2016 02:24PM | vubeat | |
| Apr 27, 2016 02:21PM | dogscarf | |
| Apr 27, 2016 11:18AM | tmsmith | |
| Apr 27, 2016 10:59AM | Hunter2 | |
| Apr 27, 2016 10:58AM | Hunter2 | |
| Apr 27, 2016 09:55AM | tmsmith | |
| Apr 27, 2016 08:35AM | mehinger | Edited: Apr 27, 2016 08:36AM |
| Apr 27, 2016 07:39AM | Hunter2 | |
| Apr 26, 2016 02:49PM | swindrum | |
| Apr 26, 2016 06:36AM | Hunter2 | |
| Apr 22, 2016 05:49PM | Hunter2 | |
| Apr 19, 2016 06:13AM | Hunter2 | |
| Apr 18, 2016 07:07AM | Hunter2 | |
| Apr 17, 2016 06:21PM | Hunter2 | |
| Apr 17, 2016 05:01PM | bluebox | Edited: Apr 18, 2016 02:13AM |
| Apr 17, 2016 04:10PM | nkerr | |
| Apr 17, 2016 01:05PM | Hunter2 |

|
Total posts: 654
Last post: Dec 20, 2017 Member since:Sep 24, 2011
|
Cars in Garage: 0
Photos: 0 WorkBench Posts: 0 |
|
Why so stingy with the grease?
|
|
Total posts: 6469
Last post: Sep 29, 2022 Member since:Nov 2, 2006
|
Cars in Garage: 4
Photos: 1354 WorkBench Posts: 2 |
|
Image Gallery
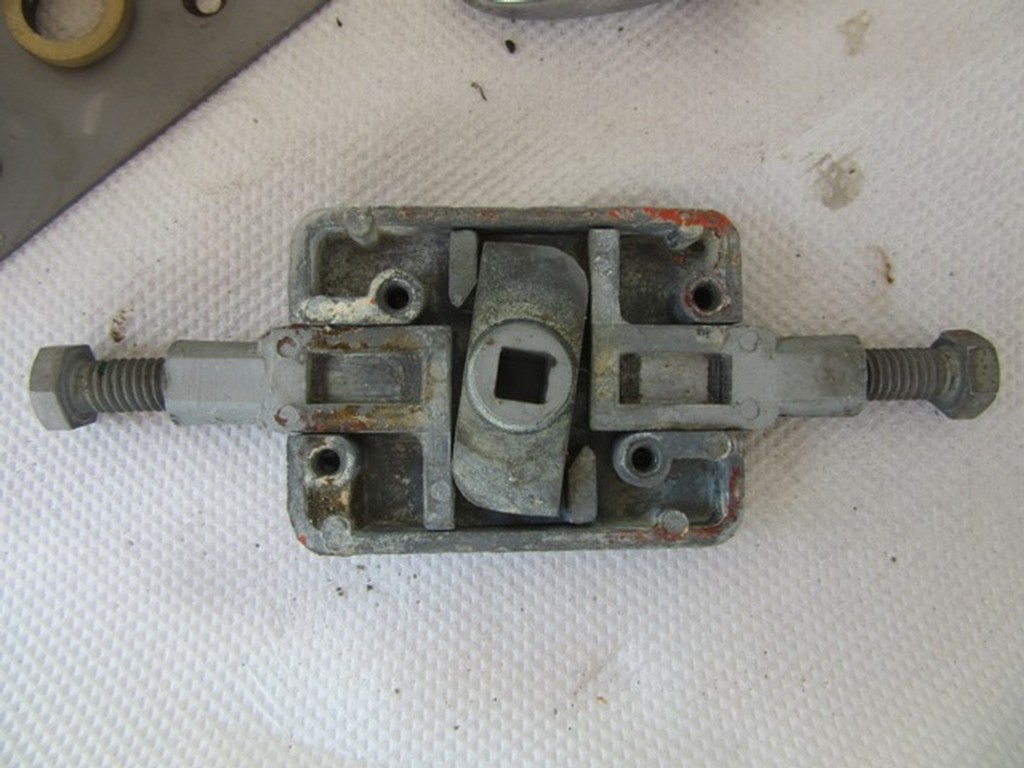
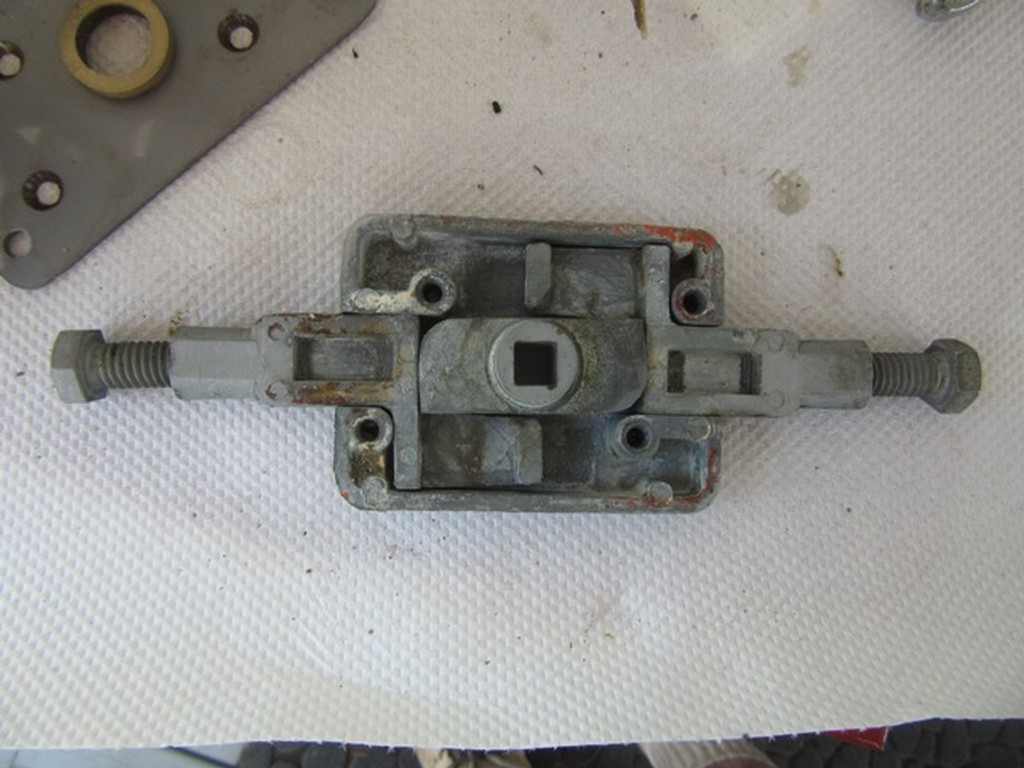

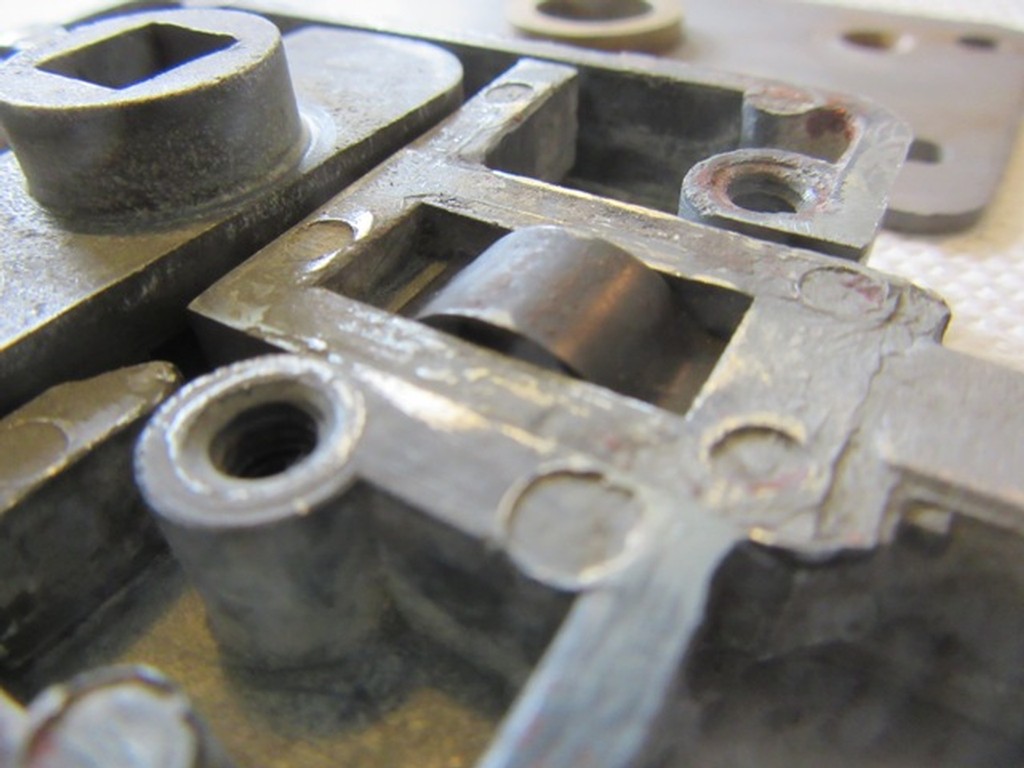
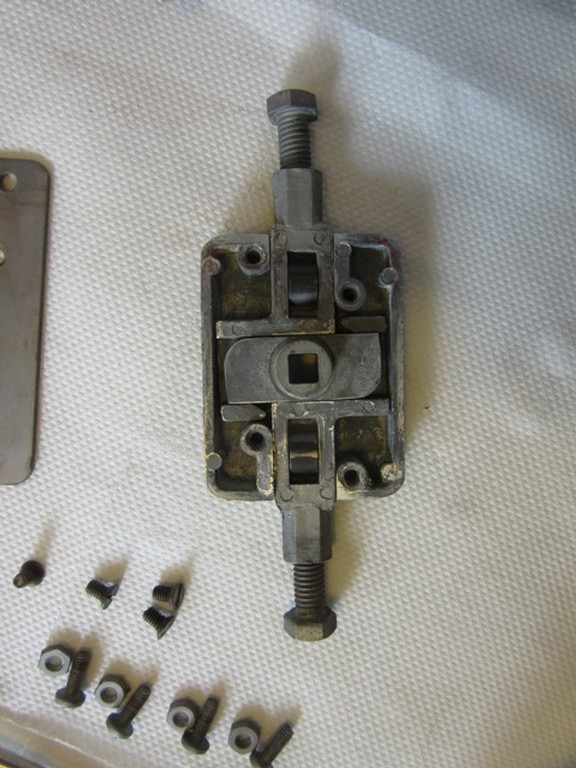

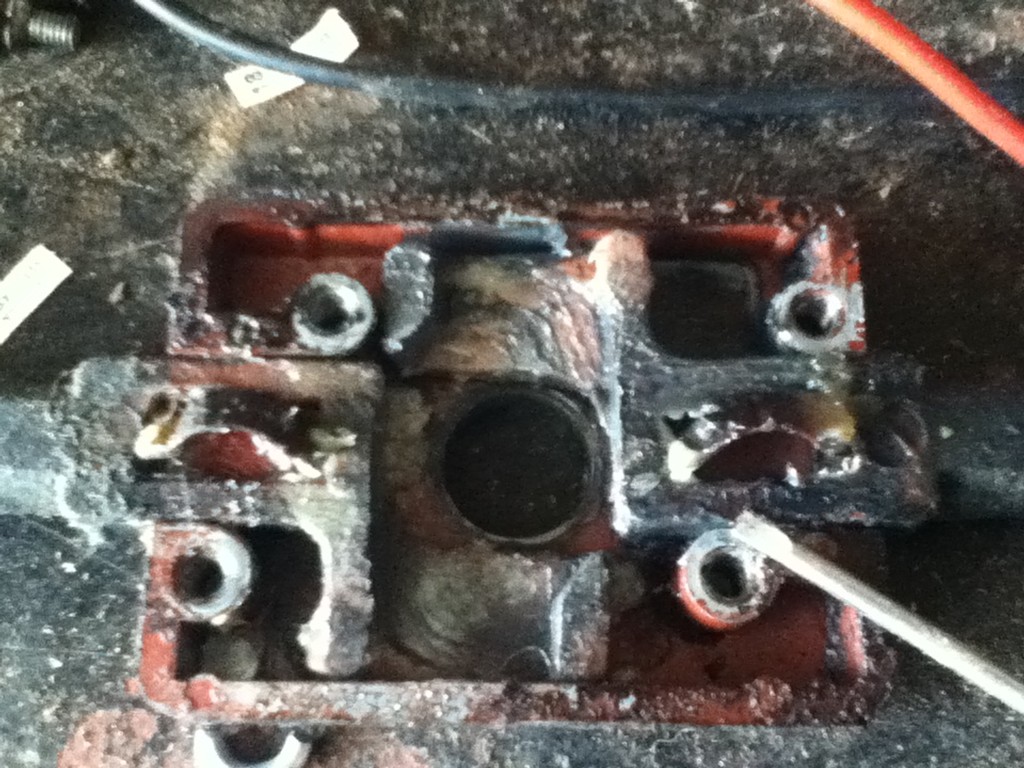
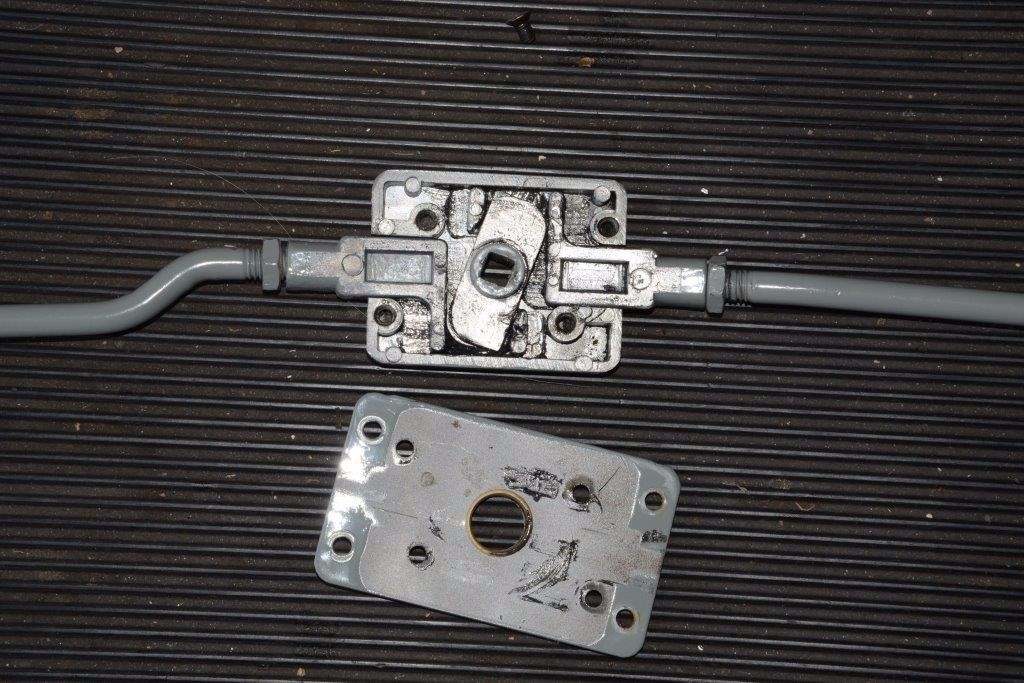
Cleaned up the bits & reassembled.
PHOTO set: shows the bits, cleaned up (wet/dry & Brake Clean), regrease with wheel bearing grease & reassembled.
|
|
Total posts: 654
Last post: Dec 20, 2017 Member since:Sep 24, 2011
|
Cars in Garage: 0
Photos: 0 WorkBench Posts: 0 |
|
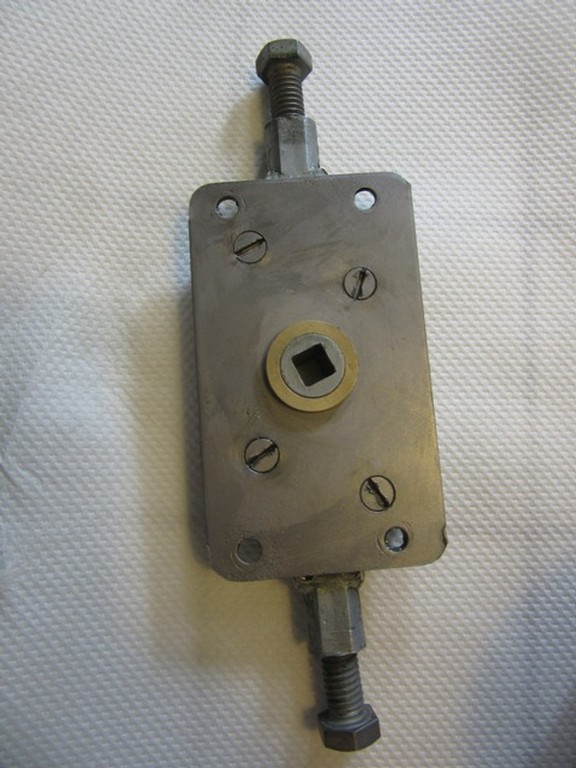
ah!, so the springs don't return the mechanism they act as sliders to hold the parts and provide some sliding friction
great photo, thanks
|
|
Total posts: 73
Last post: Nov 29, 2021 Member since:May 29, 2004
|
Cars in Garage: 0
Photos: 0 WorkBench Posts: 0 |
|
 springs(2) work to prevent rattle, and provide a bit of friction, in an otherwise very loose mechanism.
|
|
Total posts: 367
Last post: Jul 19, 2022 Member since:Jun 18, 2014
|
Cars in Garage: 0
Photos: 0 WorkBench Posts: 0 |
It looks fantastic! Keep up the good work and keep the pics coming.
Dogscarf!
Dogscarf!
|
|
Total posts: 3749
Last post: Mar 26, 2024 Member since:Jun 23, 2000
|
Cars in Garage: 1
Photos: 201 WorkBench Posts: 0 |
|
 So no metal strip style spring in here then:
|
|
Total posts: 6469
Last post: Sep 29, 2022 Member since:Nov 2, 2006
|
Cars in Garage: 4
Photos: 1354 WorkBench Posts: 2 |
|
Will look for 3M strip caulk. Thanks!
|
|
Total posts: 6469
Last post: Sep 29, 2022 Member since:Nov 2, 2006
|
Cars in Garage: 4
Photos: 1354 WorkBench Posts: 2 |
|
No spring in the opening mechanism on the barn door on ROO the Aussie Window Van and none in the mechanism for LUCKY the Woody either.
Once unlocked, it is a simple twist to open, twist to close.
Once unlocked, it is a simple twist to open, twist to close.
|
|
Total posts: 3749
Last post: Mar 26, 2024 Member since:Jun 23, 2000
|
Cars in Garage: 1
Photos: 201 WorkBench Posts: 0 |
|
Rick:
Do you have the rear latch mechanism apart while it is off the car?
I would love to see how the internal spring is used is used and placed in the mechanism.
Terry
Do you have the rear latch mechanism apart while it is off the car?
I would love to see how the internal spring is used is used and placed in the mechanism.
Terry
|
|
Total posts:
Last post: Mar 25, 2022 Member since:Sep 4, 2000
|
Cars in Garage: 0
Photos: 3 WorkBench Posts: 0 |
|
I am just now taking my first look at this thread. Nice work!!! On the issue Malsal raises of what to seal the wood to the body with, I have always used a product called 3M strip caulk. I think it is still available
|
|
Total posts: 6469
Last post: Sep 29, 2022 Member since:Nov 2, 2006
|
Cars in Garage: 4
Photos: 1354 WorkBench Posts: 2 |
|
Image Gallery
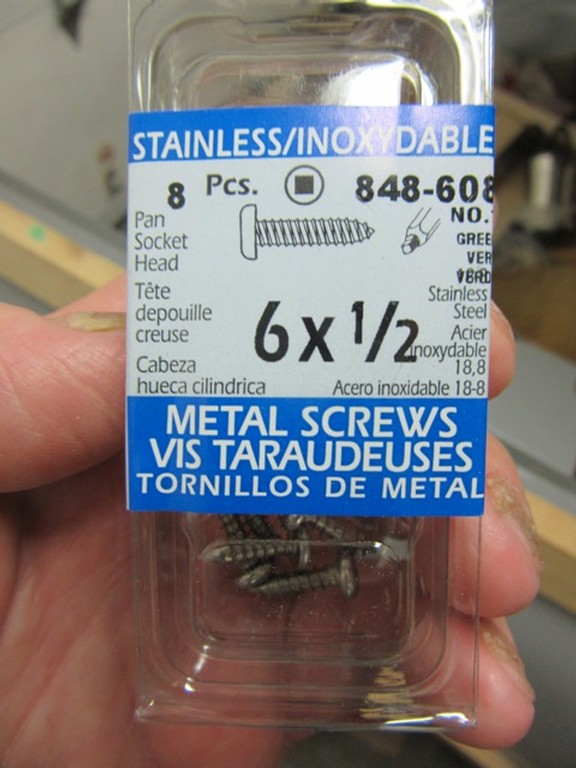
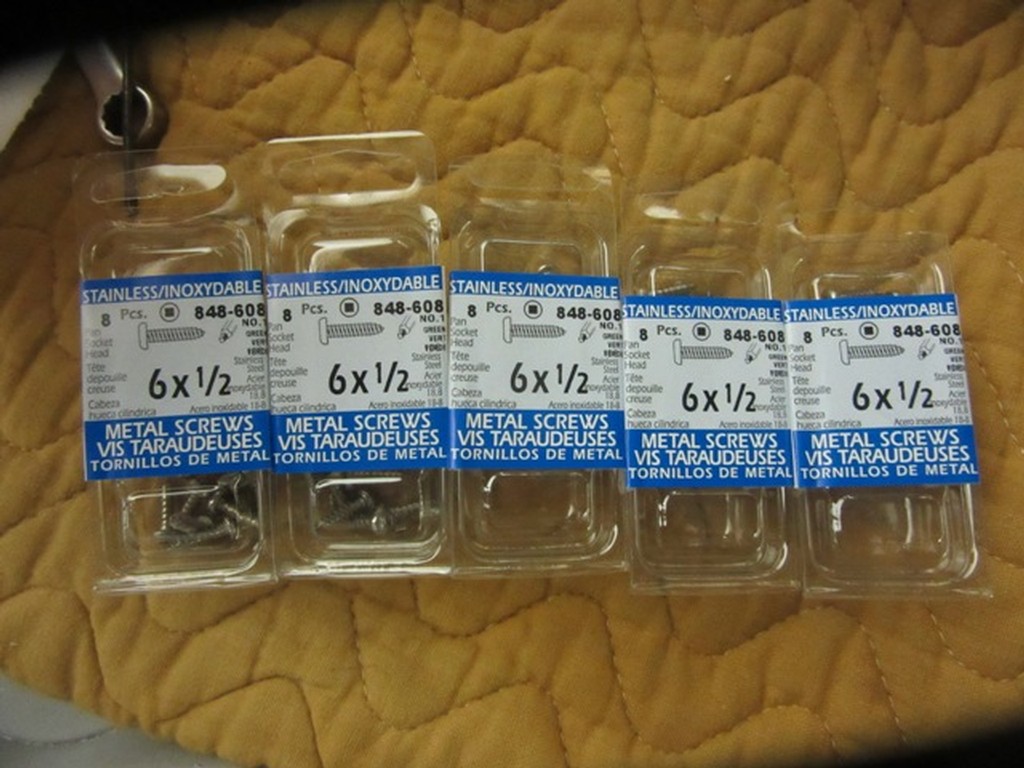
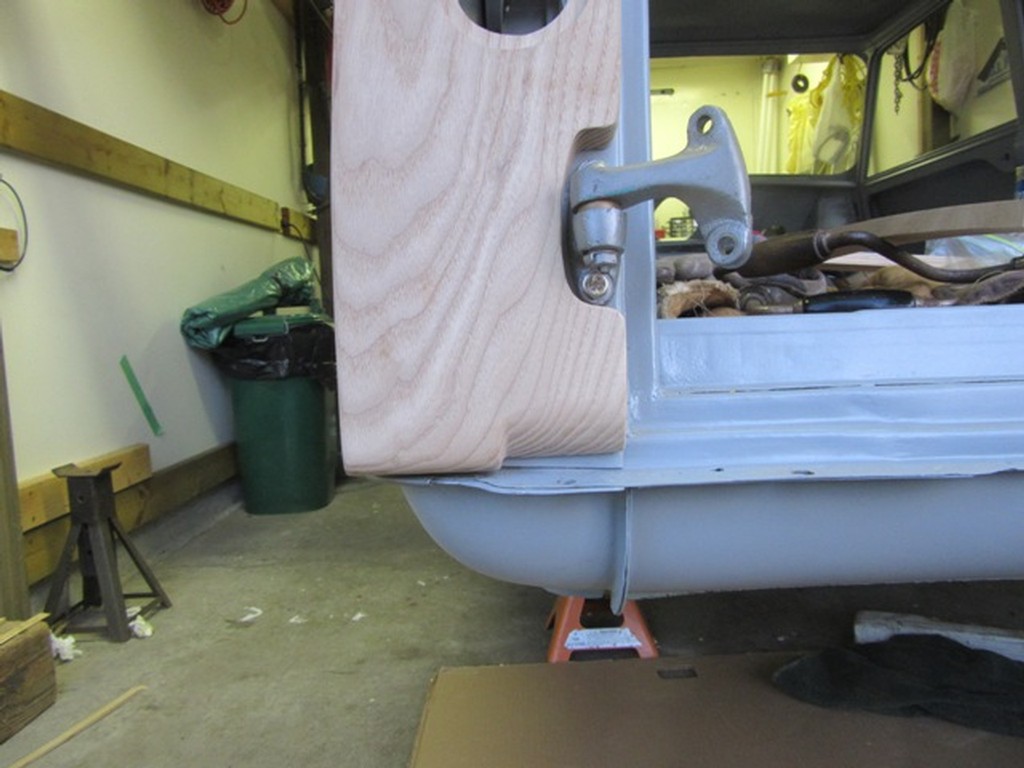
RH barn door - with opening handle - needs 2 nutserts & Allen keyed 8 -32 Stainless screws. Pre-drill wood with 1/4" holes (ensure not more depth than needed).
LH barn door needs four 8 - 32 nutserts & screws.
Only 18 1/4 -20 internal threaded nutserts & SS cap screws are needed for the install...74 8 -32 internal threaded nutserts are need for the install. The E-Z LOK nutserts in the kit are not available in Canada.
|
|
Total posts: 1456
Last post: Jan 31, 2022 Member since:Sep 8, 2003
|
Cars in Garage: 1
Photos: 186 WorkBench Posts: 0 |
|
Quote:
Originally Posted by Hunter2
Norm, I think we have resolved the fastener install methods...but the kit was short 2 doz. 8-32 brass Nut Serts & 3/8" button head cap screws...trying to find those now & to ID the screws needed for the Wood on the Barn Doors (screws are in addition to the 4 nutserts/cap screws per door). Masal, there will be 'something' behind the wood. Looking at options for final install after Woody is painted.
Sean Windrum
1996 MGF VVC
1970 1275 GT Racer
66 Austin Countryman
63 997 Cooper (Under Construction)
63 MG 1100
|
|
Total posts: 6469
Last post: Sep 29, 2022 Member since:Nov 2, 2006
|
Cars in Garage: 4
Photos: 1354 WorkBench Posts: 2 |
|
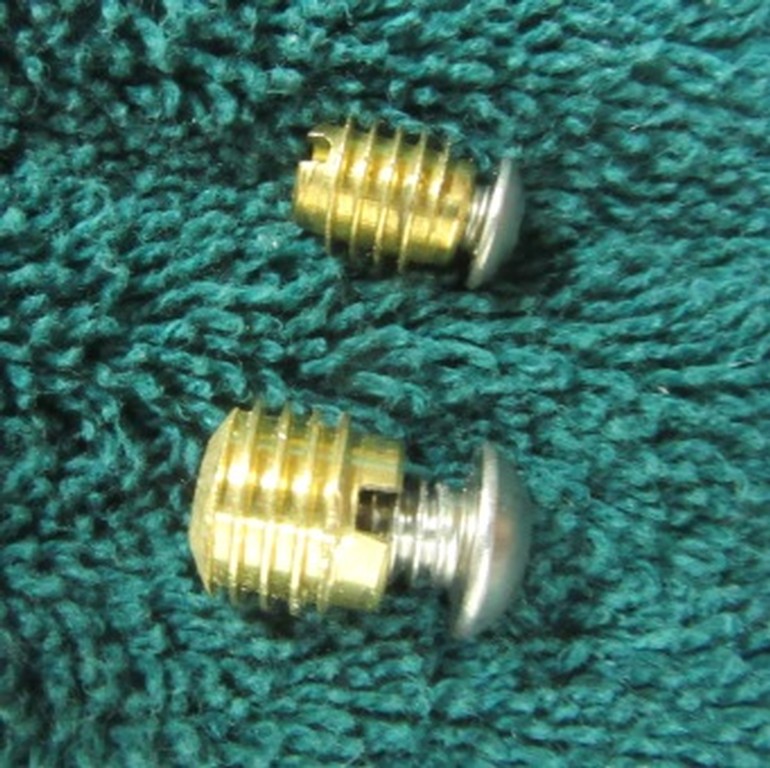
Tick, tock...the needed brass nutserts & SS Allen key headed screws are on their way from California.
Note to Tagus/Ron - in later kits the difficult screw locations at the rear arches were replaced with studs. Look to see if you have them. If not, it is easy to cut down 1/4 - 20 SS cap screws to suit and Red Locktite them in place.
Note to Tagus/Ron - in later kits the difficult screw locations at the rear arches were replaced with studs. Look to see if you have them. If not, it is easy to cut down 1/4 - 20 SS cap screws to suit and Red Locktite them in place.
|
|
Total posts: 6469
Last post: Sep 29, 2022 Member since:Nov 2, 2006
|
Cars in Garage: 4
Photos: 1354 WorkBench Posts: 2 |
|
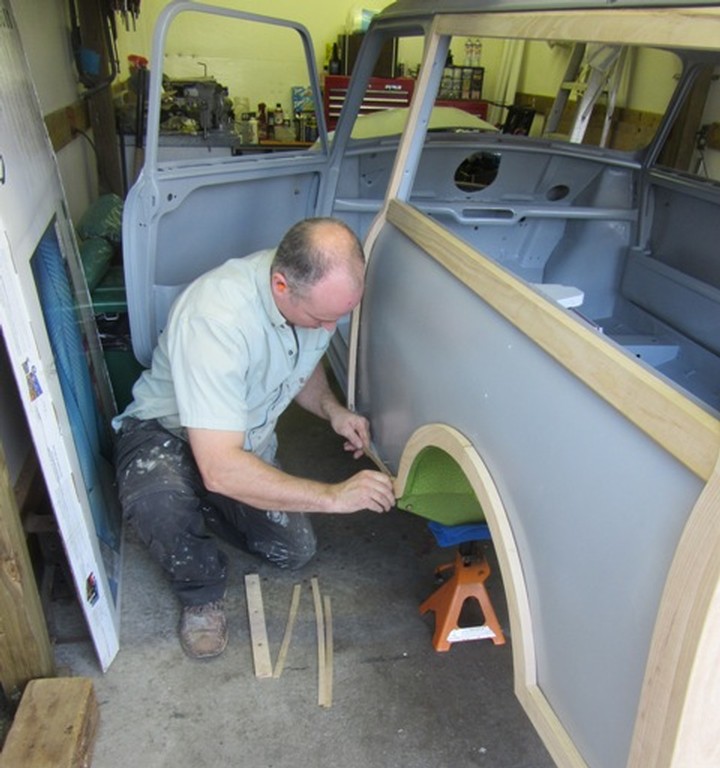
Have spoken to the body/paint man. He can take LUCKY in 3 weeks...so Saturday, May 14th likely day to move the Mini. He also welcomes me to his shop to offer the wood up as the body work goes along.
Extra Z-Z LOK nutserts & cap screws are on their way from California. LUCKY will be ready to go for body & paint.
Extra Z-Z LOK nutserts & cap screws are on their way from California. LUCKY will be ready to go for body & paint.
|
|
Total posts: 6469
Last post: Sep 29, 2022 Member since:Nov 2, 2006
|
Cars in Garage: 4
Photos: 1354 WorkBench Posts: 2 |
|
A few days off as we await the arrival of the additional E-Z LOK brass inserts & SS Allen keyed cap screws that are needed (made in USA, NOT available in Canada).
Odd because I found 1/4 - 20 inserts & cap screws here...but NOT ANY 8 - 32 inserts & cap screws.
Odd because I found 1/4 - 20 inserts & cap screws here...but NOT ANY 8 - 32 inserts & cap screws.
|
|
Total posts: 6469
Last post: Sep 29, 2022 Member since:Nov 2, 2006
|
Cars in Garage: 4
Photos: 1354 WorkBench Posts: 2 |
|
 NOTE:
NOTE:Ken kept the Ash he trimmed off the rear uprights with the band saw. Some bits were very useful to shim tenons when the mortises needed to be moved to address alignment issues.
The thin strips on the floor are the Ash removed from the uprights.
|
|
Total posts: 6469
Last post: Sep 29, 2022 Member since:Nov 2, 2006
|
Cars in Garage: 4
Photos: 1354 WorkBench Posts: 2 |
|
Image Gallery
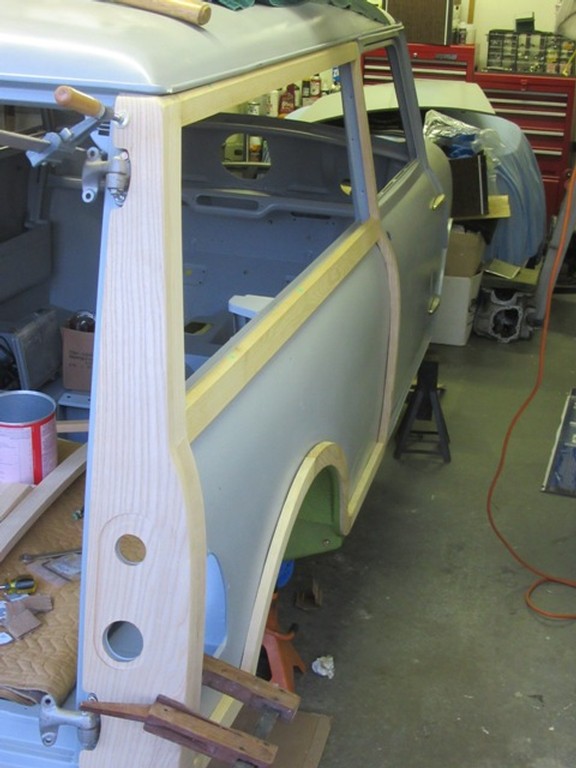
Glueing of the two sides DONE (except for the short uprights from the arches to the mid-rails).
Soon, I'll be able to take over and finish sand, shape the edeges and get ready for 'coating'.
(Ken is keeping the tools he modified to get the job done. Will be quicker the next time.)
|
|
Total posts: 1276
Last post: Nov 26, 2018 Member since:Feb 17, 2005
|
Cars in Garage: 0
Photos: 0 WorkBench Posts: 0 |
|
Very cool , nice that you have a woodworker doing the frame. Iam jealous Rick. Can I get first dibs on your wagon when your done, with it. Cheers
|
|
Total posts: 654
Last post: Dec 20, 2017 Member since:Sep 24, 2011
|
Cars in Garage: 0
Photos: 0 WorkBench Posts: 0 |
|
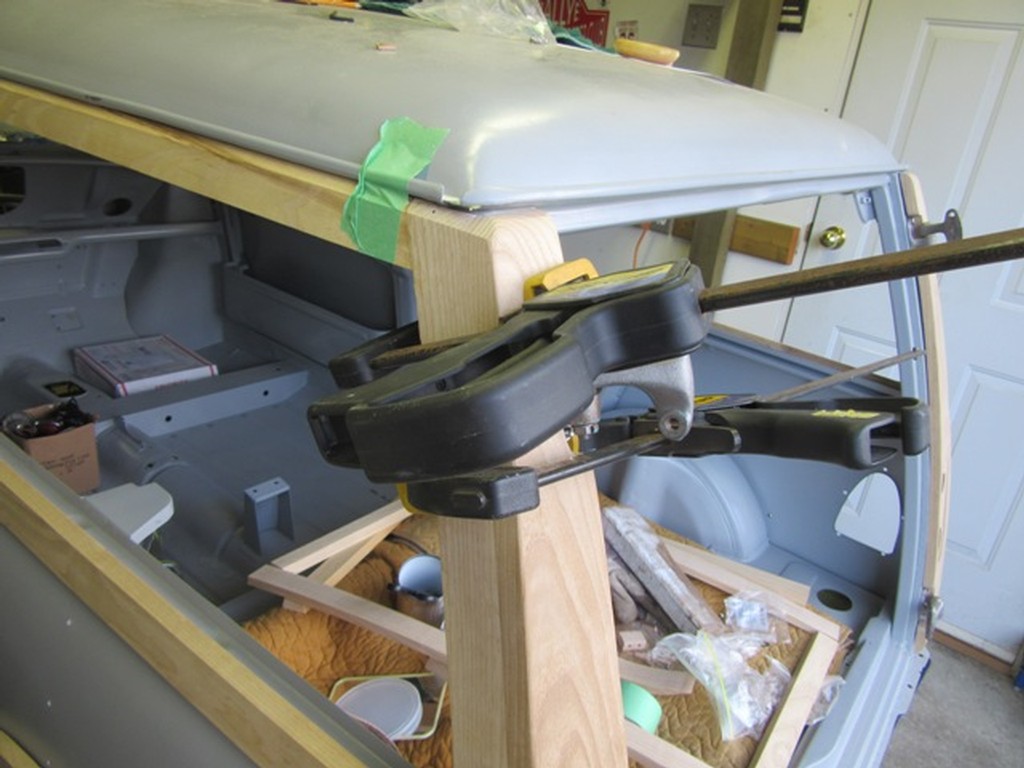
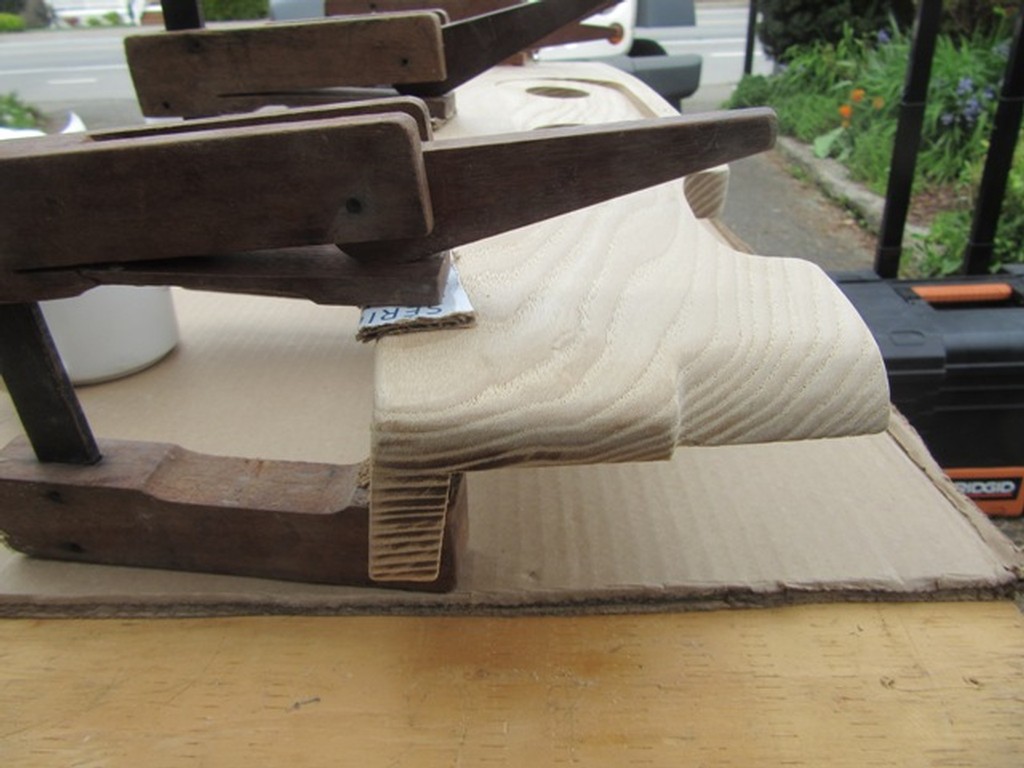
those wooden, wood clamps are really cool!
|
|
Total posts: 6469
Last post: Sep 29, 2022 Member since:Nov 2, 2006
|
Cars in Garage: 4
Photos: 1354 WorkBench Posts: 2 |
|
Image Gallery


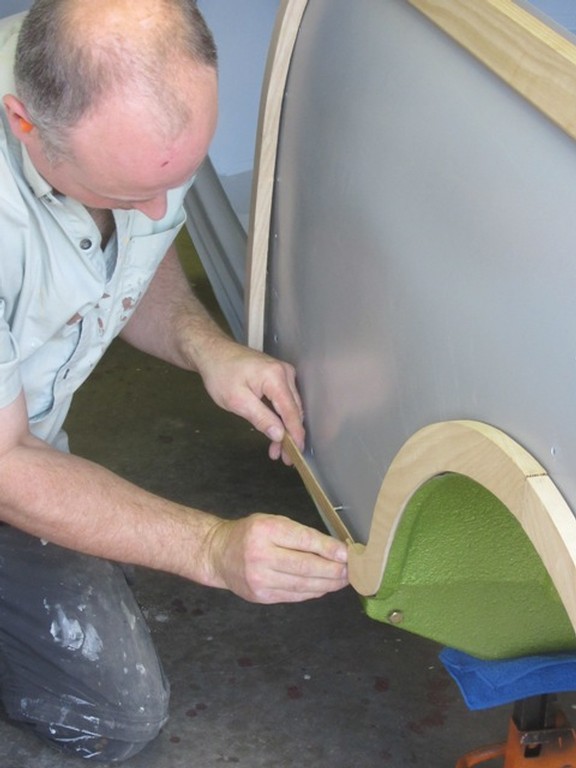
Wood bits getting some shaping & gluing together today - to fit the rear corner bumpers. RH side B Pillar upright needs some thinning as it is visibly thicker than the LH side upright.
Progress being made!


