A-Series Engine Timing Chains Explained
 Building an engine is very much like most things in life - the more effort you give to attention to detail the more likely you will get the results you want.
Whether you are installing a new stock or performance camshaft or even simply rebuilding your motor with the stock camshaft, one of the most important things you can do is get the valve timing correct.
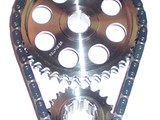
But before you can accurately set your timing you MUST have a timing gear and chain set that is not loose. A loose timing gear/chain set can be the result of simply worn out gears/chain or very often because the motor has had a 'line bore' done on the crankshaft at least once in its life.
The process of line boring a block requires that the main caps be machined down to make the bore smaller. A new perfectly round hole is then made. This process results in the center line of the crank being moved over so lightly closer to the camshaft. The result is that even a new set of stock gears & chain will still be loose. One solution is modifying the assembly to accept a tensioned chain from a later model motor. This is a pretty good option if you are handy with fabricating and you're not building a high performance motor.
The best solution to this problem was developed some years ago by a company in Australia that simply made oversized gear sets that compensate for the crank centerline movement while using the stock chain. For the first time in several years, these gear sets are available in a few different specifications; +.002, +005 and +.010. See below to determine which oversize set will work best for you.
If you are rebuilding a motor that has an unknown history you won't know how far the crank center-line has been moved. It could be somewhat of a trial and error process to determine what you need.
The first step in deciding what action is needed is knowing when a timing chain is too loose. The following process can even be done with the engine still in the car.
1. Slowly turn the crankshaft pulley in a clockwise direction. Watch the distributor and observe that the rotor is moving. Stop turning.
2. Mark the damper pulley position with chalk or observe the degree wheel.
3. Very carefully turn the crankshaft in the other direction and VERY carefully observe the rotor in the distributor. The instant it begins to move STOP turning and mark the crankshaft position again.
4. Measure the number of degrees of rotation of the crankshaft. If there is a lot of slop in the chain then you will have moved the crankshaft ten or fifteen degrees (or more) before taking the slop out of the chain after the reversal before the camshaft began to turn.
Results- Get the picture?? If all is well and there is no slack in the timing chain then you will see about two to three degrees of "reverse motion" before the distributor begins to turn.
If you aren't sure how many degrees the crankshaft turned during the procedure there is a simple way to calculate the answer based on the spacing between the chalk marks:
Take a string and wrap it around the crankshaft damper where you made the chalk marks to measure the circumference of the damper. Let's say it was 18 inches. If there is one inch between the chalk marks then divide 1 by 18 and multiply the result by 360 (the number of degrees in a circle). In this case the answer is 20 degrees and it is time to replace the gears!!!
How to determine which ovesized timing gear set will meet your needs.
AFTER FITTING YOUR STANDARD TIMING CHAIN SET TO THE ENGINE YOU NEED TO PINCH WITH TWO FINGURES THE CHAIN HALFWAY BETWEEN THE CRANK AND THE CAM SPROCKET ON THE RIGHT HAND SIDE. WITHOUT FORCING OR PUSHING HARD JUST MOVE THE CHAIN BACK AND FORTH AND NOTE THE AMOUNT OF MOVEMENT.
USE THIS FORMULA
1/4" = .002 TO .004”
5/16” = .004 TO .006”
3/8” = .006” TO .008”
1/2” = .008 TO .010”
THESE SIZES ARE THE AMOUNT OF THE OVERSIZE YOU NEED TO ORDER