This installation guide is for the following MINI Cooper Models:
- Clubman (R55) 2008-2014
- Hatchback (R56) 2007-2013
- Convertible (R57) 2009-2015
- Countryman (R60) 2011-2016 Base, S and All4
- Paceman (R61) 2013-2016
- Hatchback (R50) 2002-2006 Base
- Convertible (R52) 2005-2008 base and s
- Hatchback (R53) 2002-2006 Cooper S
PLEASE KEEP IN MIND.... that the mirror light is NOT activated by the mirror cover flap but by positioning the visor in the down position.
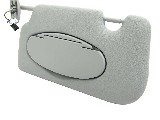
In this video we show you how to replace the OEM / Factory Replacement sun visor (driver's side LHD) in a 2007 MINI Cooper S.
The procedure is the same for all MINIs.
or the right hand side.
Transcription
Hi gang its Brendon from Mini Mania and today we're going to do a quick video on how to replace the Sun Visor on your Mini Cooper at least your Gen 2 Mini Coopers and show you something that's going on with ours.
Well our door, a little cover for the vanity lights, has basically completely snapped off. It was on here until a few seconds ago, but when I went to go and see what was wrong with it, it just completely came off in my hand. So there's a good reason to replace it.
Also there's something going on where it's not really very well secured over on this side so we're going to replace this and I'm going to show you how to do that.
One thing to note with these Sun visors the cover that sits on here actually doesn't affect turning on and off these lights.
The lights are actually affected by a motion sensor so that when they're in the down position, the vertical, position they stay on.
You'll notice when it goes up the light turns off so as you can see once it gets to about here the lights go off. If you get one and you connect it and you and you notice that for whatever reason the light isn't on, it may just be because of the way that the position of this thing on the arm is as it comes out of the box.
But anyway, yeah so they turn off like that and so that cover is only there just to keep this closed when you're not using the vanity light. But the lights are always on when it's in the down position. So in order to take this off there are these two little covers that are the plastic covers.
You can use a small flat bladed screwdriver or something plastic if you can, that you can get in between the edge of that and take these out just so you don't Mar them, and they cover over two Phillips head screws. And that's all it takes to actually take the Sun visors are off. But of course there's also the electrical connection for the lights, so I'm going to undo these screws and then we'll go on from there.
Okay, I've actually left the Sun Visor clipped over here just so it's not going to fall down and put a bunch of weight on this electrical connection right here and that's what you need to disconnect. And if I can do it with one hand I will, you just need to separate this piece from this piece here, it's not that piece from this piece, it's this piece here small one from this piece right here, and I'll just disconnect that.
You'll see if I can show it while I do it, it's a little bit of a cramped space, I think I can do it and then you just pull it apart just like that. Okay and then we can just take the sun visor out and then of course replacing it is just a reverse of that same procedure so we'll hook up the electrical first and I'll show you exactly what the story is again with the vanity light.
Okay, here's the new one and I've also placed this one in the clip just to hold it and I have reconnected the electrical connection and I've tucked it up into the hole. I'm just going to put my two screws on and put the covers on and as you'll notice if you open it up, it is working and that's me, so let me do that real quick, get it secured.
Okay, now the new one is back in place we can test it and the light and again, notice as it comes up that before that lid actually closes, right about when the lid touches the headlining.
Yep! It turns off. And again it doesn't have anything to do with the lid, the lid doesn't control it, the lid is is just to cover it. But anytime this is in the down position the lights going to be on even if you're not looking and using the lights.
Okay so it's always good that this has got a good spring to the cover and of course the new ones, will ours was a little tweaked so we've now replaced it.
And so there you go, and that's all there is to the installation.
If you got any questions you can give us a call or email us. Give the video a “like” and share it with your friends and subscribe to our channel.
We would love it and if you guys have ideas for certain videos you can always leave those in the comments.


